Coconut Mochi Cake
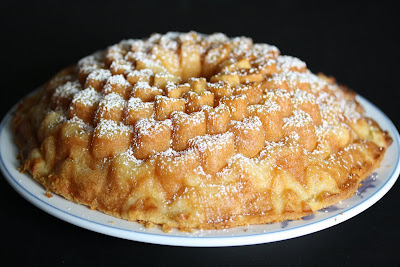
This mochi bundt cake is chewy and flavored with coconut. It’s an easy cake to make – you only need one bowl for the batter – and it’s baked in a 10-cup bundt pan. If you want a creative cake idea, this coconut mochi cake is a good one to try.

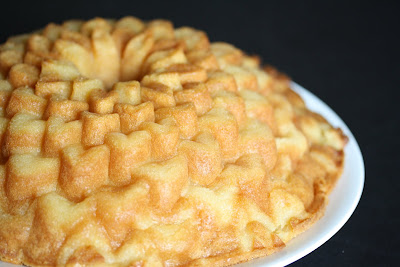
I’ve been wanting to use my new Nordic Ware Chrysanthemum Bundt Pan![]() * for a while now. I was trying to find the perfect cake to make it with.
* for a while now. I was trying to find the perfect cake to make it with.
Then I came across this coconut mochi cake recipe by Une-Deux Senses, which I actually found a while back, and forgot about. I’ve never made a mochi bundt cake before, but I wanted to try it out.
At first, I was a bit worried about the recipe I saw. It was very similar to the base recipe I have used to create my mochi cakes, but it also added an additional can of coconut milk and some water, without removing the evaporated milk that is usually in the base. It seemed like too many liquids!
I followed the recipe as is, and it was very, very liquidy. But I hoped for the best, and an hour later, my cake came out.
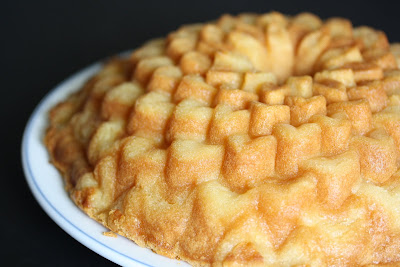
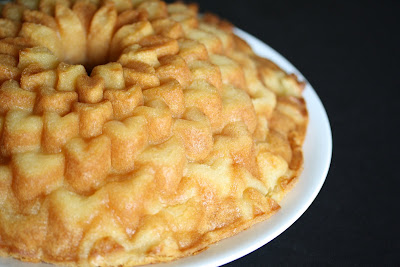
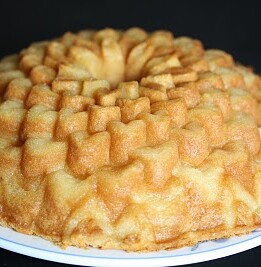
I love my nordic ware bundt. I remember the old days when it would take me forever to get a cake out of a bundt. A lot of banging, coaxing, knifing around the edges. But since discovering Nordic Ware, baking bundts has become so much easier. My cake slid right out like water. And all the beautiful little petal designs came out perfectly.
Ingredients
- Melted butter
- Vanilla
- Sugar
- Beaten eggs
- Baking powder
- Mochiko flour
- Evaporated milk
- Water
- Coconut milk
Recipe Steps
Beat eggs and sugar together in a large bowl. Add vanilla, butter, evaporated milk, coconut milk, and water. Add in mochiko flour and baking powder. Mix and pour the batter into a 10-cup bundt pan.
Bake the cake for an hour at 350°F, until a toothpick comes out clean. Cool completely before slicing and serving.
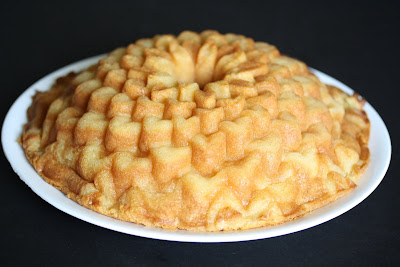
I know that you don’t usually see powdered sugar on mochi, but the cake was begging for a dusting of powdered sugar, so I put it on anyway.
I think the cake didn’t have much of a coconut taste. It was super chewy. It was definitely more mochi than cake, whereas the past ones I’ve baked are more of a mix of a cake and mochi.
I liked it but thought it was a bit weird to be eating the mochi like a slice of cake, and it took a while to chew and finish.
My favorite part was the top layer that got brown from the pan. It was harder and chewier, kind of like the edge pieces of brownies. Boyfriend liked that part the best too.
More Mochi Cakes
*Some of the links contained in this post are affiliate links. Much like referral codes, this means I earn a small commission if you purchase a product I referred (at no extra charge to you).
Coconut Mochi Cake
Ingredients
- 1 stick butter, melted
- 2 tsp vanilla
- 2 cups sugar
- 4 eggs, beaten
- 2 tsp baking powder
- 1 (16-oz) box box Mochiko flour
- 1 (12-oz) can evaporated milk
- 1/2 cup water
- 1 (13.5-oz) can can coconut milk
Instructions
- Preheat oven to 350°F.
- Beat eggs and sugar together. Add vanilla, butter, evaporated milk, coconut milk and water. Add in mochiko flour and baking powder. Pour mixture into bundt pan
- Bake the cake for an hour, until an inserted toothpick comes out clean. Cool completely before serving.
Pingback: Current Fascination: Mochi Cakes. « Green Basket
Oops. One stick is 1/2 cup here in the US. Mochiko is the most well known brand of sweet glutinous rice flour. It is sold in most asian grocery stores here. Especially Japanese ones. Here’s a pic of it on amazon https://www.amazon.com/Mochiko-Sweet-Flour-1-Pound-Packages/dp/B000LLXBKY/ref=sr_1_1?ie=UTF8&s=grocery&qid=1284056146&sr=8-1
hi, this looks great. i wonder if you could tell me how much is a stick of butter? because i live in the uk, and we don’t have “1 stick”. Also, what is Mochiko flour? thanks.
It was not sweet enough for my family but my friends, neighbors, and I loved it. Next time I will use a flat rectangular cake pan. And cut the cake in small squares.
It is an easy recipe. And yummy. =)
Linda just brought some over and it was delicious.
I will definitely use this recipe. It’s an easy recipe too.
Thanks! I love the pan =)
What a beautiful cake!!! The pan is spectacular!
I think it’s my favorite nordic ware pan right now! I can’t wait to make more cakes with it.
Very nice! I love my pan too! 🙂
Thanks for the compliment! I really loved how it turned out too! I let it sit for quite a while before cutting it so that I could admire it. hehe.
This is one of the most beautiful cakes I’ve ever seen – the picture on Tastespotter made me come right over. Very nice…